Grade 2/3: Drawing and Painting Guitars
(2 double period classes)
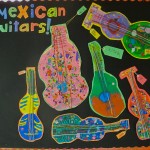
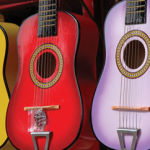
To start, I brought in a couple of visuals. Some pictures of brightly coloured Mexican guitars, along with the equally colourful musicians who play them AND my friend Brian’s custom acoustic guitar. Now, his guitar wasn’t as big and colourful as a true Mexican guitar – but setting it up at the front of the class gave the students a basic form and the details to draw that day. Plus, some of them got pretty excited to tell me that they have a guitar at home, and I learned that a couple of them are even learning to play guitar. Very cool.
Oh, did I say I had some guitar music playing in the background? I did, later. (after I finished talking, that is) Oscar Lopez, in fact – who I first heard play at the Calgary Folk Festival. Awesome.
But I digress.
Now, To Really Start:
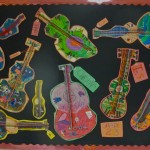
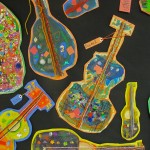
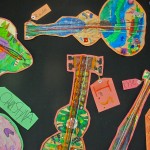
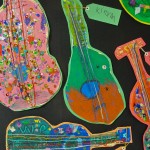
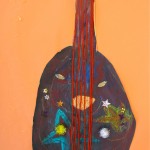
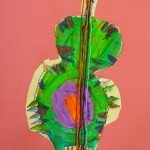
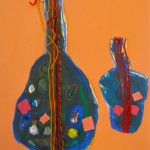
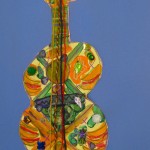
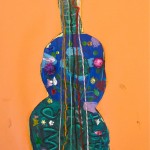
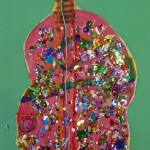
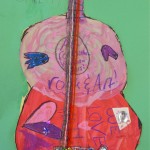
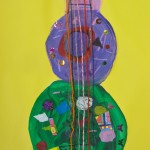
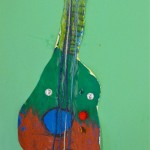
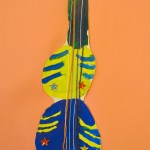
I gave them big sheets of manilla paper and encouraged them to fill their page with a quick pencil drawing of the guitar, and all of it’s details. Draw what they see, not just what they think a guitar might look like. I kept this part of the project quick, so they did not become discouraged or bored, or start overdrawing what the paint would eventually cover anyway. That kept the shapes fresh and they didn’t have to worry about proportions, or drawing a ‘perfect’ guitar.
Next, we broke out the paint and got some fun colours happening! I told them there would be another material I would make available later, but PSST – it was a secret.
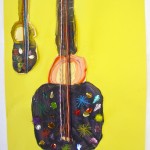
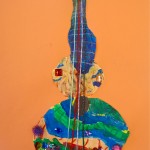
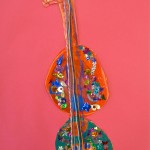
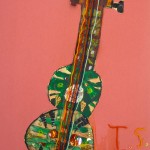
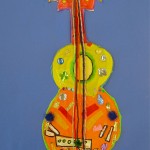
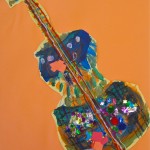
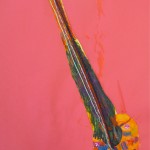
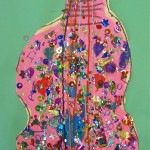
They could choose what colours of paint they wanted to use, but it had to be more than one. There were a couple of girls who were really bent on pink (as you can see), so you guess what colours I gave them. They were not to paint the guitar strings in black, because we were going to use yarn glued on for that at the end. (still not the secret ingredient yet)
After the paint dried, the strings glued on (I would recommend a small tray with slightly watered-down glue in it, and dipping the pieces of yarn – cut longer than what will be needed – before applying it to the paper), and the dust settled – it was time.
Time for sequins, a few sparkly pompoms, AND even a few large 3D gems. Wow. They were in seventh heaven! We had plenty of the sequins, so I didn’t limit those, and as you can see – the two pink guitar girls did not hold back. Ha ha. Then they cut out their guitars: almost done.
The last part was for them to glue their guitars onto a coloured background. I had them choose the colour that was opposite the main colour of their guitar, looking at the colour wheel – or close to it. Complementary colours, in fact.
We are enjoying all of the results on the bulletin board outside the Art Room, even now.
-
- Rachel
-
- Dawson
-
- Graham
-
- Lily
-
- Michael
-
- Igor
-
- Alison
-
- Izabel
-
- Kyle
-
- Benjamin
-
- Mercedes
-
- Olivia
-
- Christina
-
- Ava
-
- Kailin
-
- Kieran
-
- Brendan
I’m not completely happy with the guitars mounted on the paper as is – I may try to recut with the background as a border and then glue onto cardboard. Maybe. It’s not like I don’t have anything ELSE to do.
Doing this made the guitars show much better … they really pop! Not only that, but when it comes time to send them home, they are more rigid/durable, and will hang quite well there.
Fall 2012 / Parliament Oak
The source for this lesson?
Painted Paper: Fun Art Projects for Kids
www.paintedpaperintheartroom.blogspot.ca
You must be logged in to post a comment.