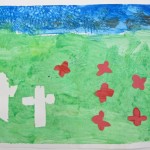
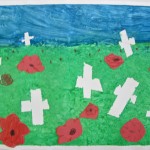
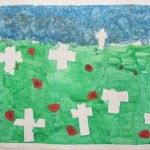
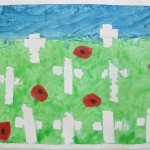
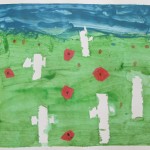
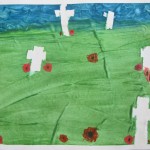
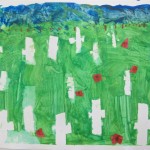
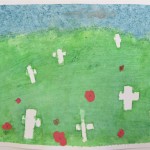
Grade 2/3 Poppy Fields

Marlow / 2009
This is the second time I have done this lesson over the years, but the first time predated this website. Just days before the school assembly honouring those who fought to keep our freedom, we did this lesson in one double period.
I began by reviewing some basic ideas in landscape: establishing a horizon line, and the different scale of objects near and far away: depth of field (no pun intended). Foreground, middleground, and background. I always love this part because I demonstrate by standing alarming close to one student (that always gets their attention when I use my big voice as well) and then moving back, and back again (slamming into the white board or even out into the hall works well).
I was so pleased to see that they were familiar with the poem ‘Flanders Fields’; several students chimed in to recite it to me. We talked about grave markers in our town’s cemetery, and then the ones found in those fields in France. Today, we would be using only the white crosses as markers.
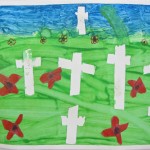
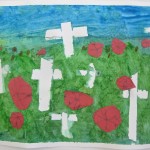
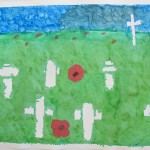
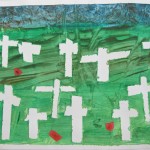
Each student had one piece of heavy paper (bristol board, as we could not afford watercolour for this) taped to the table in front of them. Drawing lightly with pencil, I had them position the horizon line at least 3/4’s of the way up the page. They were going to need most of the painting to be the field so they could have room for lots of crosses, and to try their hand at establishing depth of field using scale.
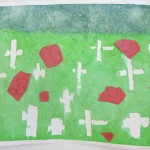
Each student had scissors, and so we gave them each a length of green painter’s tape, already cut in half lengthwise. They cut the pieces for their crosses (long one for the vertical part, short piece for the other), putting the bigger crosses at the bottom (foreground) of their page, and the small ones at the top at the horizon line (background), with the middle-sized ones in the middleground. It was important to emphasize the placement of the different sizes. I pointed again to my drawn example on the board, so they understood how to establish a sense of distance (depth of field). Another important detail: they really need to press the tape firmly onto the page so that the edges of the cross keep the paint out.
Now it was time to crack out the paint (and smocks, of course). I gave each pair of students two double trays (President’s Choice Butter Chicken/Pad Thai/Chicken Korma containers work great for these, plus I can catch a break in making dinner once in a while) … one of green and a bit of yellow or white, and then one of blue and a bit of purple or orange. I encouraged them to not just use the paint straight from the bottle , but to mix as they painted on the page. Yes, they could paint right over those tape crosses!
We have a basket of items that are good for texture (sponges, fruit netting, small squares of bubble wrap, forks, etc.) – which I almost forgot – with these they could give their wet paint some texture if they liked. The bubble wrap was a particular favourite!
As their paintings dried, with the aid of a roaming hairdryer or two in the hands of the teacher and I – it was time for the poppies.
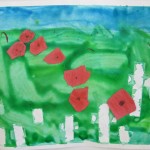
Using red construction paper from the scrap box, and red pencil crayons to colour them even more (same idea as not just using the paint from the bottle), they were to draw different sizes of poppies and cut them out. Lots of poppies. I reminded and showed them that those poppies at the horizon lines would be little more than dots (in fact, they could use the pencil crayons at the end to add some to the background if they liked) AND that poppies would NOT be bigger than the crosses around them. Quite a bit smaller, in fact!
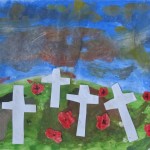
A single dot of black with Sharpie marker completed the poppies, so now it was time for the magic reveal! Carefully lifting the green painter’s tape crosses off their pages, they could see the contrast of the white crosses against their green fields and blustery skies. Woot!
(just a note here: the painter’s tape did allow some paint to bleed in a little, so regular making tape might be better if you have good quality heavy paper – watercolour – but you run the risk of it tearing the paper as you try to lift them off. It’s a trade-off)
Poppies were then pasted on, artistry signed, and I put each painting in a black construction paper frame to complete. Very moving, in conjunction with the assembly.
-
- Marlow / 2009
-
- Michael
-
- Kailin
-
- Mercedes
-
- Kyle
-
- Igor
-
- Dawson
-
- Kieran
-
- Ava
-
- Izabel
-
- Brendan
-
- Alex
-
- Christina
-
- Olivia
-
- Rachel
In Flanders fields the poppies blow
Between the crosses, row on row,
That marks our place; and in the sky
The larks, still bravely singing, fly
Scarce heard amid the guns below.
We are the Dead. Short days ago
We lived, felt dawn, saw sunset glow,
Loved and were lovoed, and now we lie
In Flanders fields.
Take up our quarrel with the foe:
To you from failing hands we throw
The torch; be yours to hold it high.
If ye break with us who die
We shall not sleep, though poppies grow
In Flanders fields.
(John McCrae, May 1915)
Many thanks to Gail at that artist woman blog for this project. Definitely a winner! http://www.thatartistwoman.org
Another note: this is one project where I think it is good NOT to have a completed example for them to see. They are familiar with the image of the poppy field from their classwork, and the surprise they experience when lifting the masking tape is worth them having to trust me with the process. There is more variety to be had sometimes when there is not a finished object that says “Do it THIS way”.
You must be logged in to post a comment.