Grade 2/3 Paper Weaving
Duration: 2 double classes
-

- Matt
-
- ???
-
- Ella
-
- Olivia
-
- ??
-
- ?
-
- Lucas
-
- Sol
-
- Simply, KM.
-
- Alice
-
- Nick
-
- Maddie
-
- Nathan
-
- Owen
-
- Kyle
-
- Jackson
-

- Jay
-
- Keona
-
- Genny
-
- Clara
First off, BIG thanks to Deep Space Sparkle artblog for this lesson idea. Deep Space Sparkle was the first Art Ed website I used to cruise, and it sent me off in oh so many directions (and bookmarks) for ideas that I can’t WAIT to bring to those eager students who stop me in the halls and say, “Mrs. Godwin – do we have Art with you today?”
My idea for this lesson was for it to be a springboard for another, more traditional weaving project AND to have some fun along the way…
Day 1 (double period):
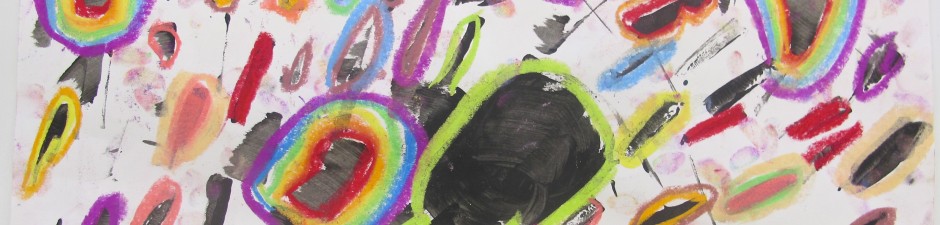
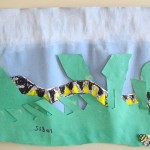
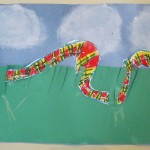
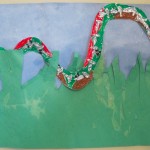
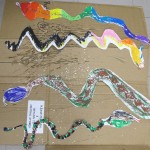
To introduce the lesson and catch their interest we talked a little about snakes; some different types, how they move, what different colours/markings have they, and … what if you could make up your own kind of snake?
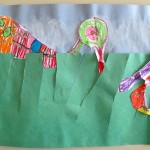
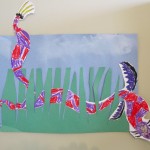
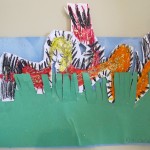
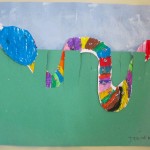
We gave them each a sheet of white paper, and I showed them how to draw a snake in pencil: two wavy lines alongside each other across the page. One end comes to a point (perhaps), and the other has an oval shape (perhaps), for the head. They could include design details in pencil if they liked. I encouraged them to use the whole length of the page – they would want the maximum opportunity to get happy with the luscious oil pastel colours coming up!
This is where it started to get fun – colours that POP by using the pastels to the max. I didn’t give them a lot of time to fuss over small details in pencil, but brought the pastels on strong pretty quickly, so there was minimal frustration with the medium being less accurate and, well, messy.
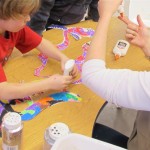
After the pastel work, they cut out their snakes (with their name on the back – a step I often forget). Then it was back to the table at the rear with Mrs. Burton to apply glue and shake glitter on in the “glitter tray” (a most necessary piece of equipment). How fun! We left them to dry for another day.
Day 2 (probably a double session; I can’t quite remember):
Now for the sky.
We gave them diluted white paint to paint a wash of clouds on a light blue sheet of construction paper, then put that aside to dry.
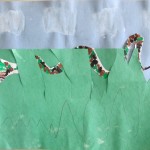
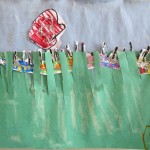
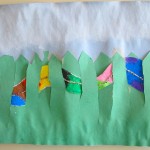
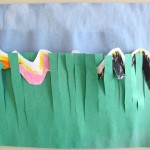
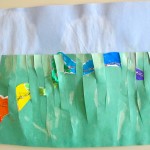
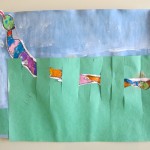
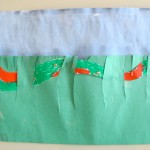
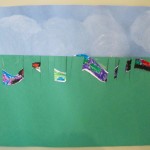
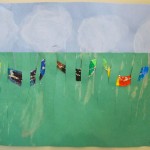
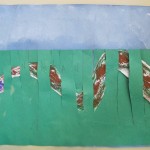
I began the next part with some instruction from the front, introducing them to the 3 W’s: weaving, warp, and weft. The warp is the vertical strings that the weft (horizontal) is woven into. In this case the warp is the grass and the weft is … the snake! Each student got a full sheet of light blue and 1/2 sheet of green construction paper, and then I showed them how to cut the green on the long side at least halfway down agin and again. For those who were nervous about their ability with scissors, this proved good practice.
The next step was important for them to understand: glue the lower half of the green paper (the UNCUT part) onto the lower half of the blue paper (less cloudy?). The leaves of grass were NOT to be glued YET.
Guess what’s next? Weave that snake between the leaves of grass (hello Walt Whitman): under and over, under and over, under and – you get the idea. So interesting to see how they each approached this part. Some kids struggled at first to understand, a couple were quite sure they couldn’t do it, some were meticulous with every leaf used in succession, others more haphazard. We helped one-on-one, kids helped each other, and they were all very pleased with their beautiful snakes now hiding or slithering through the grass. I’d say this was a project they would remember for a long time.
Not quite done, though. The final glueing of the snake and the leaves over the cloudy sky (a little more instruction needed there) to finish up. We reviewed them all at the front of the class, with comments from me and their classmates – and then to the walls of the hallway for proud display. Gorgeous!
(definately a ‘do-again’)
Winter 2011 / Parliament Oak School
www.deepspacesparkle.com